

Step 1: Create AppID with Push notifications:
If You've already created the AppID, Move to Step 2 and enable Push Notifications in app settings.
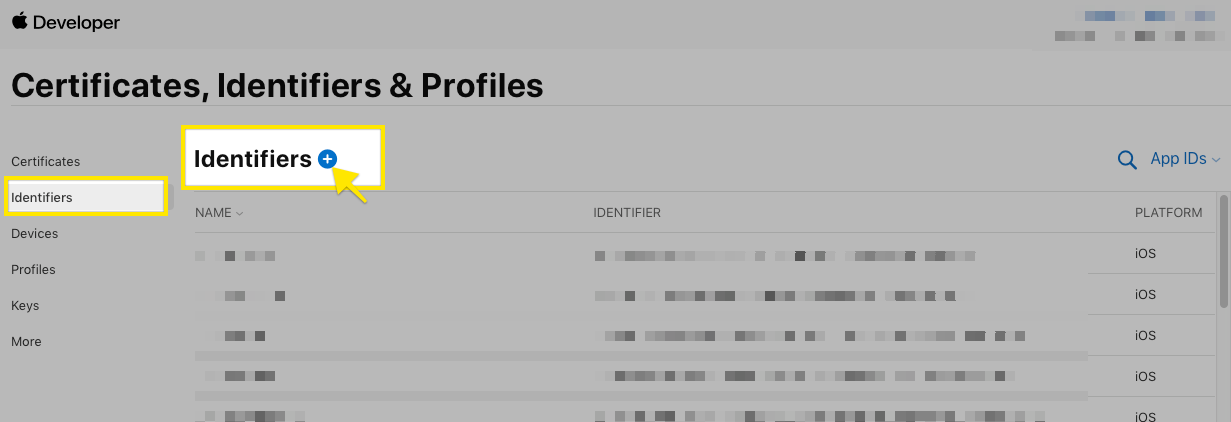
1.1. Log in to the Apple developer center and click Identifiers , then Click on Add App ID icon (+).
1.2. Choose App Ids then click on continue.

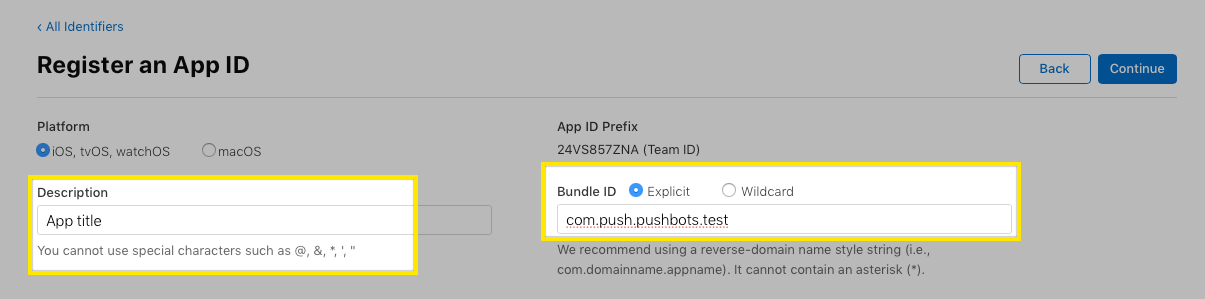
1.3. Fill AppID Form:
Enter your App ID Description
Choose Explicit Bundle ID & Enter your Bundle ID, a reverse-domain name style string (i.e., com.pushbots.appname).
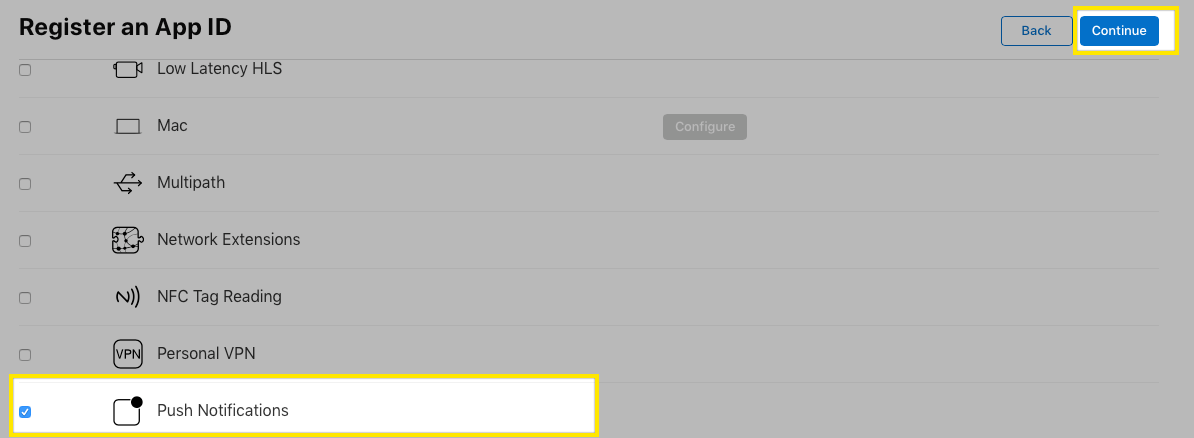
Scroll down in Capabilities, check Push Notifications then click Continue:
Ensure you have created an App ID without a wildcard. Wildcard IDs cannot use the push notification service.
Do not confuse the app identifier and the bundle identifier.
The bundle identifier is something like: com.company.appname and is defined by an app's info.plist.
3. Confirm App ID settings. Click Register:
Step 2: Generate Push Notifications certificate for Pushbots:
2.1. Open Identifers page
Click on Identifiers.
Click on the App ID you've just created.

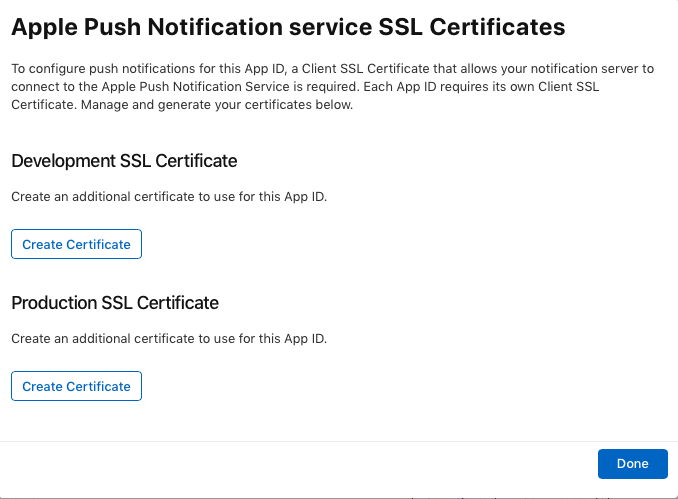
2.2. Scroll to Push Notifications section and click on Configure:

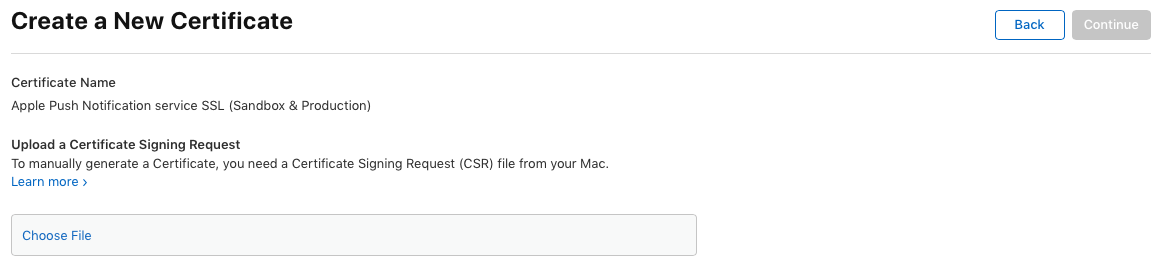
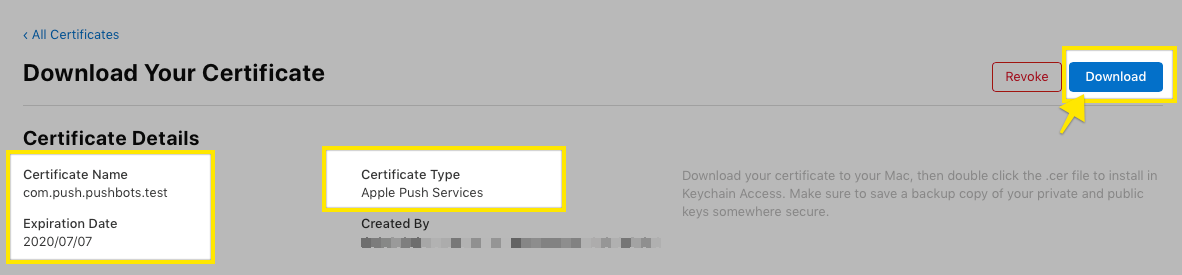
click on Create Certificate in Production SSL Certificate section, and make sure the generated certificate title starts with "Apple Push Services: "
A wizard will appear guiding you through the steps to generate a signing authority and then upload it to the portal, then download the newly generated certificate. This step is also covered in the Apple documentation.
As of December 17th 2015 the "APNs Production iOS" certificate name has been changed to "Apple Push Services.", which will work with both production and development environments.
2.3. We'll create Certificate Signing Request (CSR) file now.
In the Applications folder on your Mac, open the Utilities folder and launch Keychain Access.
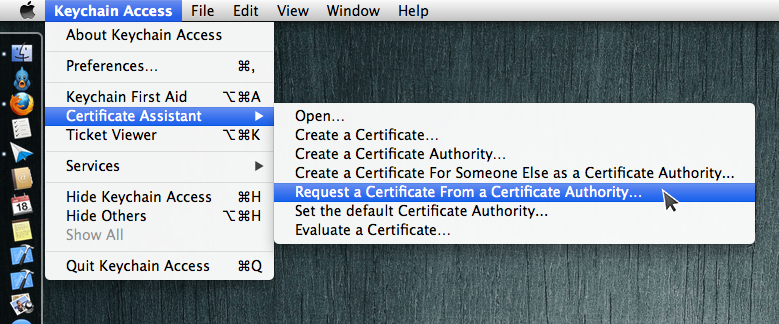
2.4. Within the Keychain Access drop down menu, select Keychain Access > Certificate Assistant > Request a Certificate from a Certificate Authority.
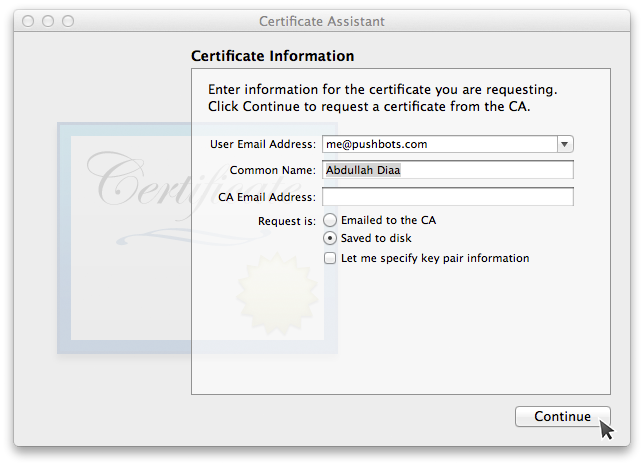
2.5. In the Certificate Information window, enter the following information:
In the User Email Address field, enter your email address
In the Common Name field, create a name for your private key
(eg. John Doe Dev Key)
Select the 'Saved to disk' option
Click Continue within Keychain Access to complete the CSR generating process .
2.6.Let's go back to Apple developer portal, click on Continue and Select the Certificate Signing request (CSR) file you've just created, then click on Generate and finally click on Done.
2.7. Click on Download, and open the downloaded certificate with keychain.
2.8. Launch Keychain again.
Filter keychains by Login
Filter Category by Certificates
Import your aps.cer into your Keychain by dragging and dropping it into login section in keychain.
You will see an expandable option called "Apple Push Services : **.**.**".
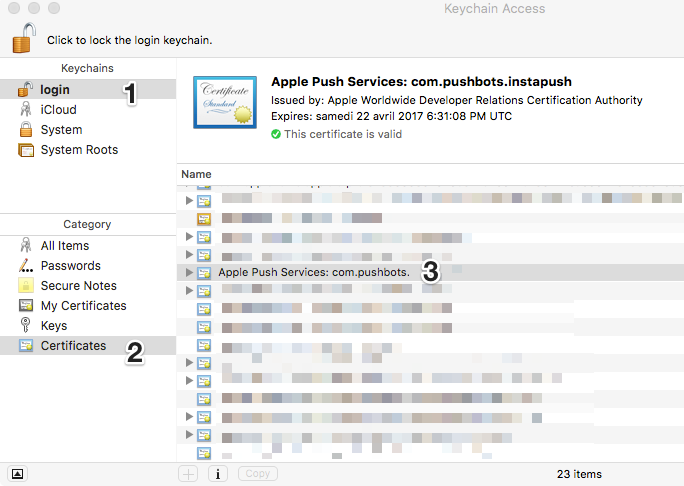
2.9.Expand this option then right click on "Apple Push Services : **.**.**" > Export "Apple Push Services : **.**.**".

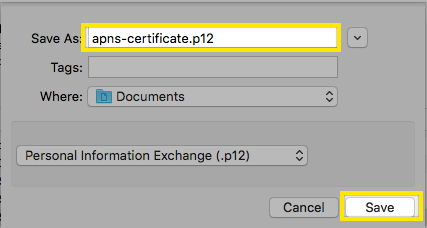
2.10. Save file as apns-cert.p12 somewhere you can access it.
leave password field empty, as PushBots won't accept certificates with password.
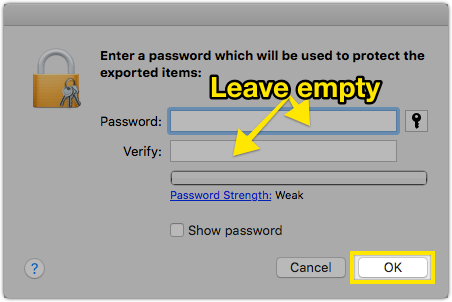
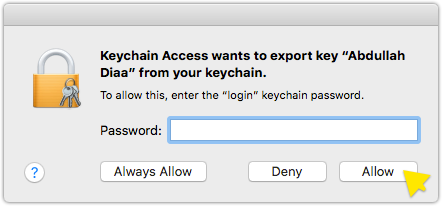
2.11. Enter your admin password to confirm and click on Allow finalize the export process:
apns-cert.p12 is the certificate file you're going to upload on PushBots.
Follow same steps to generate the production certificate.
Step 3: Add Push Capabilities:
Open your xcode project which has the same bundle identifier of the push certificate you've just exported:
First enable automatic signing or make sure it's enabled:

Automatic signing means that while developing your app with xCode, you'll have to use an app on PushBots with development certificate attached it.
And just before releasing the app to Appstore or testflight, you'll have to change the application Id in your AppDelegate to another one that uses Production certificate.
Then enable Push notifications in Capabilities tab:

Step 4 : Create iOS app on Pushbots with the generated certificate:
https://www.pushbots.help/install-pushbots-in-your-app-or-website/ios/creating-ios-app-on-pushbots